Introduction
In this digital age, communication is key, whether it’s for work, gaming, or connecting with loved ones. As technology advances, so does the need for seamless audio experiences. One such device that has gained popularity is the earbud microphone. In this article, I will guide you through the process of using an earbud mic on PC Windows 10, unlocking the potential for crystal-clear audio in your everyday activities.
Overview of Earbud Microphones
Earbud microphones, also known as headset microphones, are compact audio devices that combine the functionality of earbuds for audio output and a built-in microphone for capturing sound. These lightweight and portable devices offer convenience and versatility, making them ideal for various purposes. Whether you’re attending virtual meetings, gaming, or recording audio, earbud microphones provide an all-in-one solution.
Importance of Using Earbud Mic on PC Windows 10
Why should you consider using an earbud mic specifically on PC Windows 10? Well, Windows 10 is one of the most widely used operating systems globally, and its compatibility with earbud microphones opens doors to enhanced audio experiences. By utilizing an earbud mic, you can improve the quality of your voice during calls, enhance your gaming experience with clear communication, and create professional-grade audio recordings effortlessly.
With the groundwork laid, let’s delve into the steps required to harness the power of your earbud mic on PC Windows 10. Stay tuned for the next section, where we will discuss the compatibility aspect and how to ensure your earbud mic is compatible with your PC.
Connecting Earbud Mic to PC Windows 10
Now that you have ensured the compatibility of your earbud mic with PC Windows 10, it’s time to connect it and unleash its potential. Follow these simple steps to seamlessly integrate your earbud mic into your PC setup.
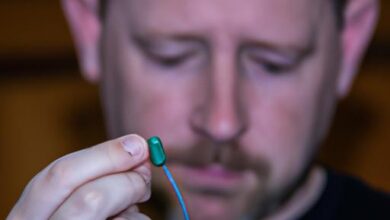
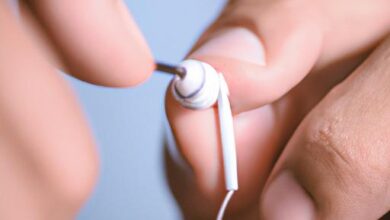
A. Identifying the Correct Audio Jack
First things first, locate the audio jack on your PC. Depending on the model, it may be located on the front panel, back panel, or on the side of your computer. Look for a small port labeled with a microphone icon or a headset icon.
B. Inserting the Earbud Mic into the Audio Jack
Once you have identified the correct audio jack, gently insert the plug of your earbud mic into the corresponding port. Ensure that the plug is fully inserted to establish a secure connection.
C. Ensuring Proper Connection
To ensure a proper connection between your earbud mic and PC Windows 10, check the sound settings on your computer. Right-click on the speaker icon in the system tray and select “Sounds.” In the “Recording” tab, you should see your earbud mic listed as an available device. If it’s not listed, try disconnecting and reconnecting the earbud mic or restarting your PC.
Once you have successfully connected your earbud mic to PC Windows 10, you are one step closer to enjoying enhanced audio experiences. In the next section, we will explore how to configure the settings for your earbud mic on PC Windows 10, optimizing its performance for your specific needs.
Configuring Earbud Mic Settings on PC Windows 10
Now that you have successfully connected your earbud mic to your PC, it’s time to configure the settings to ensure optimal functionality. In this section, I will guide you through the necessary steps to access the sound settings, select the earbud mic as the default input device, and make adjustments to microphone levels and enhancements.
A. Accessing Sound Settings
To begin, we need to access the sound settings on your PC. To do this, follow these steps:
- Right-click on the volume icon located in the taskbar at the bottom right corner of your screen.
- From the context menu, select “Sounds” to open the Sound settings window.
B. Selecting the Earbud Mic as Default Input Device
Once you are in the Sound settings window, follow these steps to select your earbud mic as the default input device:
- In the Sound settings window, navigate to the “Recording” tab.
- You should see a list of available recording devices. Locate your earbud mic from the list.
- Right-click on your earbud mic and select “Set as Default Device” from the context menu.
C. Adjusting Microphone Levels and Enhancements
Now that your earbud mic is set as the default input device, you can make adjustments to fine-tune the microphone levels and apply enhancements. Here’s how:
- In the Sound settings window, locate your earbud mic from the list of recording devices under the “Recording” tab.
- Double-click on your earbud mic to open its Properties window.
- In the Properties window, navigate to the “Levels” tab to adjust the microphone volume. You can increase or decrease the volume by moving the slider.
- To apply enhancements, switch to the “Enhancements” tab. Here, you can enable or disable features like noise suppression or echo cancellation based on your preferences.
By following these steps, you can configure your earbud mic settings on PC Windows 10 to ensure optimal audio quality and performance. In the next section, we will discuss some common issues that you may encounter and how to troubleshoot them effectively.
Troubleshooting Common Issues with Earbud Mic on PC Windows 10
Even with the best technology, occasional hiccups can occur. If you encounter any issues with your earbud mic on PC Windows 10, don’t worry! Here are some troubleshooting steps to help you resolve common problems and get your audio back on track.
A. Testing the Microphone for Functionality
The first step in troubleshooting is to determine if your earbud mic is functioning properly. Follow these steps to test its functionality:
- Plug in your earbud mic to the audio jack on your PC.
- Open the sound settings on your PC by right-clicking on the speaker icon in the taskbar and selecting “Sounds.”
- Navigate to the “Recording” tab and locate your earbud mic in the list of devices.
- Speak into the microphone and observe the green bars next to the device name. If the bars move as you speak, the microphone is receiving input.
If you don’t see any movement in the bars, try unplugging and reconnecting the earbud mic, ensuring it is properly inserted into the audio jack. If the issue persists, move on to the next troubleshooting step.
B. Updating Audio Drivers
Outdated or incompatible audio drivers can often cause issues with your earbud mic. Here’s how you can update them:
- Press the Windows key + X on your keyboard and select “Device Manager.”
- Expand the “Sound, video, and game controllers” section.
- Right-click on your audio device and select “Update driver.”
- Choose the option to search automatically for updated driver software.
- Follow the on-screen instructions to complete the update process.
After updating the drivers, restart your PC and check if the earbud mic is functioning correctly.
C. Checking for Conflicting Applications or Settings
Sometimes, other applications or settings on your PC can interfere with your earbud mic. Here’s what you can do to resolve any conflicts:
- Close any applications that might be using the microphone, such as voice chat programs or recording software.
- Open the sound settings on your PC and navigate to the “Recording” tab.
- Right-click on your earbud mic and select “Properties.”
- In the “Advanced” tab, uncheck the “Allow applications to take exclusive control of this device” option.
- Click “Apply” and “OK” to save the changes.
By following these troubleshooting steps, you can resolve common issues with your earbud mic on PC Windows 10 and ensure optimal audio performance.
Tips for Optimizing Earbud Mic Performance on PC Windows 10
To take full advantage of your earbud mic on PC Windows 10, here are some tips to optimize its performance:
A. Maintaining a Clear Audio Environment
Background noise can be distracting and affect the quality of your audio. Find a quiet space to use your earbud mic and minimize any external sounds. Close windows, turn off fans, and avoid noisy environments to ensure clear and crisp audio recordings or communication.
B. Adjusting Microphone Positioning
The position of your earbud mic can significantly impact audio quality. Experiment with different positioning options, such as placing the mic closer to your mouth or adjusting the angle. Find the sweet spot where your voice is captured clearly without any distortion or muffled sounds.
C. Using Audio Recording/Editing Software for Enhanced Capabilities
If you require more advanced features or want to fine-tune your audio recordings, consider using audio recording and editing software. These tools offer additional functionalities like noise cancellation, equalization, and audio effects. Explore options such as Audacity, Adobe Audition, or GarageBand to elevate your audio experience.
By following these optimization tips, you can make the most out of your earbud mic on PC Windows 10. Enjoy improved audio quality and seamless communication in all your endeavors.
Stay tuned for the next section, where we will conclude our guide and recap the essential steps for using an earbud mic on PC Windows 10.
Troubleshooting Common Issues with Earbud Mic on PC Windows 10
Using an earbud mic on PC Windows 10 is usually a straightforward process, but like any technology, it can encounter certain issues. In this section, we will explore some common problems users might face and provide troubleshooting tips to overcome them.
Testing the Microphone for Functionality
If you’re experiencing issues with your earbud mic, the first step is to ensure its functionality. Begin by testing the microphone on another device to determine if the problem lies with the mic itself or the PC. Connect your earbud mic to a smartphone or another computer and attempt to record audio. If it works fine on other devices, the issue may be specific to your PC Windows 10 settings or drivers.
Updating Audio Drivers
Outdated or incompatible audio drivers can often lead to problems with your earbud mic. To update your audio drivers on PC Windows 10, follow these steps:
- Press Windows + X and select Device Manager from the menu.
- Expand the Audio inputs and outputs or Sound, video, and game controllers section.
- Right-click on your earbud mic and select Update driver.
- Choose Search automatically for updated driver software and follow the on-screen instructions to complete the update.
Checking for Conflicting Applications or Settings
Conflicting applications or settings on your PC Windows 10 can interfere with the functionality of your earbud mic. Here are a few steps you can take to resolve this issue:
- Close any unnecessary applications that might be accessing the microphone.
- Open Settings on your PC Windows 10 and select Privacy.
- Under Microphone, ensure that the Allow apps to access your microphone toggle is enabled.
- Scroll down and check if the individual apps you want to use with the earbud mic have microphone access enabled.
By following these troubleshooting steps, you can address common issues that may arise when using an earbud mic on PC Windows 10. Next, we’ll explore tips for optimizing the performance of your earbud mic to ensure the best audio experience possible.
Conclusion: So above is the How to Use Earbud Mic on PC Windows 10: A Comprehensive Guide article. Hopefully with this article you can help you in life, always follow and read our good articles on the website: investing.dulich3mien.vn